|
|
his is the story of the painting of a horse. I hope to share my techniques in painting, and perhaps inspire YOU to pick up a brush and give it a try! |
Materials List:
Pro-Art Gesso (but any brand would work as well)
![]()
|
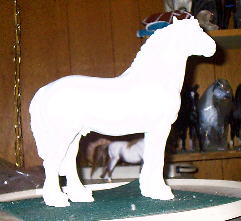
"Maximus", as this model named himself even before I decided on a color, is a VERY large Traditional-scale draft stallion, sculpted and cast by Bridgette Eberl of Germany. As with every resin I work with, I started out by prepping the body. I begin by washing down the model with rubbing alcohol to cut any release agents or skin oils that might be adhereing to him. Then a light scuffing with a fine sandpaper to give the surface some "tooth". I go over the body then with a small rattail file to take care of any seams, and filled any little pockmarks or dents with Vinyl Spackling Compound, which dries quickly, and sands easily. Once the surface is the way I want it, I brushed on two or three thin coats of Gesso to provide a good base for the paint to adhere. |
|
![]()
|
|
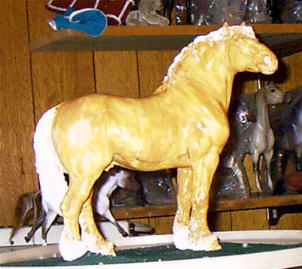
I start out with a flat base color, that usually has nothing to do with the finished color. I like a bright undercoat because with my technique of many thin layers of paint, each layer "glows" through to provide a lifelike lustre to the finished model. In this case, I used some of the Raw Sienna mixed with a bit of white. I like to use the paint a consistency of heavy cream, and you can see, this is obvious transparent with brush strokes everywhere, but since this is the first of, oh, 20 or so coats of paint, I don't worry about it. |
![]()
|
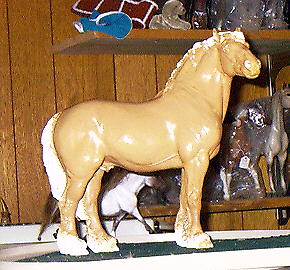
As you can see, after 3 or four more coats of paint (I admit, I added a bit more white to tone down the yellow a bit), there's a nice flat base coat to begin the real painting on. (for the curious, that's a customized galloping Breyer Shetland Pony that I did years ago in the background, waiting for a new hair job) |
|
![]()
|
|
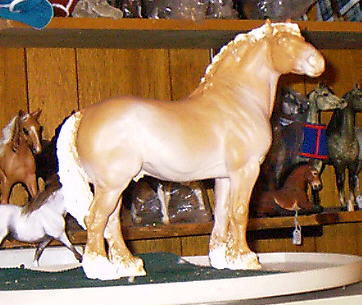
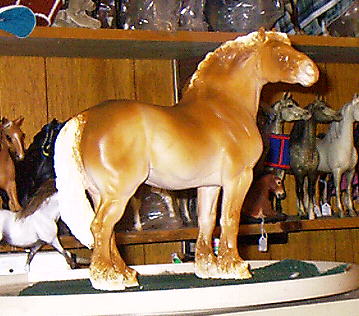
Beginning to use the airbrush now, I begin adding panagre (the lighter underbelly/flank shadings). Again, I use a thin wash of paint with many layers, in this case, the Raw Sienna with even more white added, allowing the paint to dry between applications. I hold the airbrush relatively far away from the horse (about 6" to a foot) and always keep it moving to get a delicate, smooth effect. |
![]()
|
Using straight Raw Sienna, thinned down, I begin to apply the topline shadings. I do a lot of the airbrush work at an angle to the model, to let the paint catch the physical lumps and bumps and muscles of the horse, and that creates the realistic shadings we all like. There's nothing I loathe more than artists who try to paint every little shadow and highlight with the brush, rather than letting the landscape of the model and the light of the real world do it for them. |
|
![]()
|
|
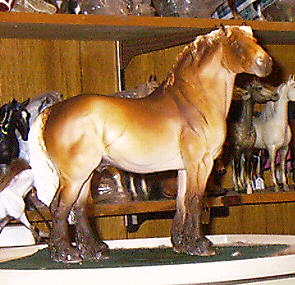
Another couple layers, this time with a bit of the Burnt Sienna added, with a touch of black to darken it even further. Notice I've also begun shading the legs and face at this point (the glossy look is from the paint being still wet). I find it so much easier to work with the horse on a lazy susan, which is what I've used here, with some rubberized cabinet liner for footing and better stability. |
![]()
|
Surprise! Maximus isn't going to be a blonde sorrel! Dark brown shadings (Burnt Sienna and Black) are added to the topline, rump, top of neck and shoulders, around the eyes and cheekbones, and of course, the lower legs and naughty bits. This shows how nicely just holding the airbrush at an angle can catch and help highlight the musculature, especially on the neck and shoulders...so much nicer than trying to outline all the dips and valleys individually. |
|
![]()
|
|
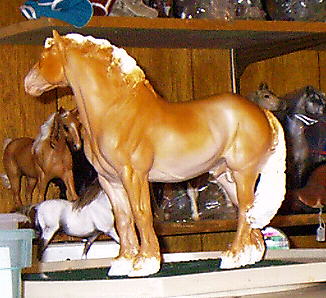
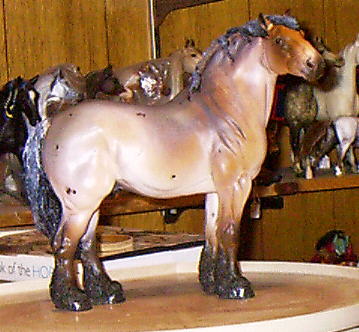
Bet you didn't see this coming! With a wash of white, thinned down with the dirty rinse water from the brush can (sort of a light beige-y color by this time), I applied a coat of basically Ecru over the rump, topline, and shoulders, to create a roan effect. Occasionally I barely pressed on the airbrush button to get tiny white spatters to add some interest to the roaned areas. |
![]()
|
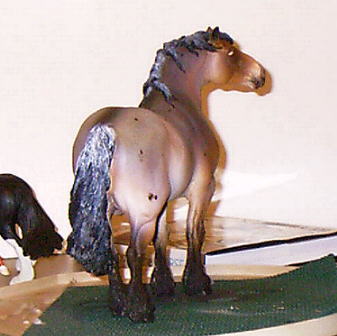
Just some white overspray made Max look too white, and lacked that interesting multi-tonal effect of real live roans, so I went back over his white roaning with a couple more washes...another of plain Raw Sienna, and then another of the dark brown color. When that dried, I started adding the dark brown corn spots, and a black mane and tail., with a bit more dark brown shadings around the eyes/cheekbones, and muzzle. |
|
![]()
|
|
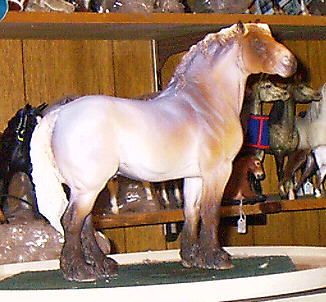
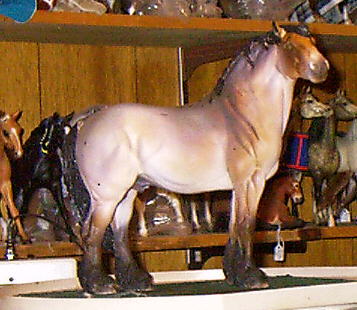
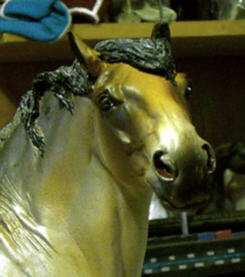
Finally I added frosting to the mane and tail, with the lighter areas towards the dock of the tail, and at the bottom 2/3 of the mane, to correspond to the roaning on the body. A few more corn spots and darker roany patches were also added. You may notice the darker line along the top of the back, this isn't a dorsal stripe, but a common pattern present in the roaning process. The eyes had been blocked in with the Medium Flesh paint. |
![]()
|
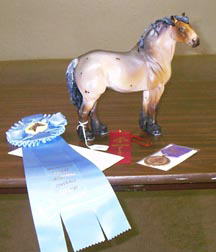
The Final Product! A bit more darker roaned areas, a couple more strawberry spots, a brand on the other side of the neck, and the eyes and nostrils and hooves finished. Finally coated with some Krylon Matte finish, the eyes and hooves and nostrils glossed with clear nail polish, and Max is ready to begin his show career!! |
|
![]()
|
|
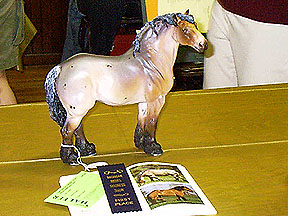
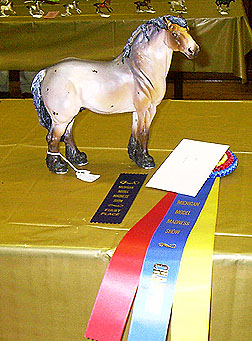
EPILOGUE.... |
On October 19, 2002, Maximus made his live show debut at the Michigan Model Madness live show, held in Hastings, Michigan. Shown as a Trait Du Nord Stallion. Here are the results of that show...
|
First Place |
First Place Artist Resin by Owner (10 entries) and |
Champion |
And The Excellence Continues...
The MEPSA 2002/2003 International Championship
Photo Show:
Top Ten - Artist Resin Draft Type Stallion (39)
Top Ten - Artist Resin Other Pure Draft Breed (27)
Top Ten - Artist Resin Solid Roans (22)
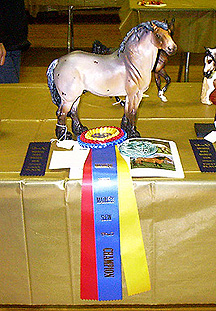
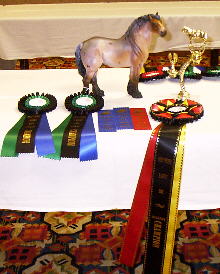
Northern Lights Live, October 4, 2003, Petoskey, Michigan
|
|
First Place - Other Pure Draft |
Michigan Model Madness, October 18, 2003, Hastings, Michigan
|
|
First Place - Other Pure Draft |
What will be in store for our hero in the future? Stay tuned...