The Creation of  Hollywood Showgirl


Materials List:


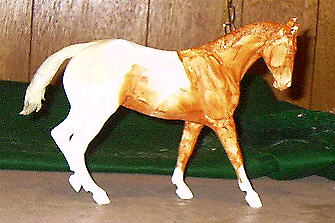
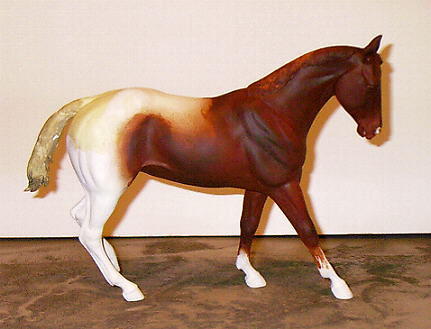
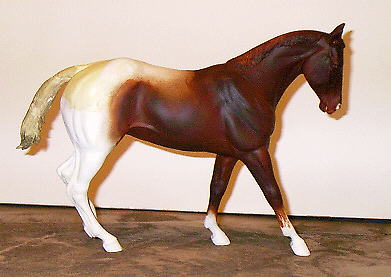
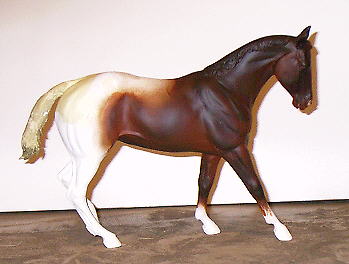
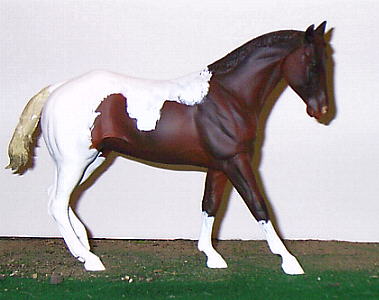
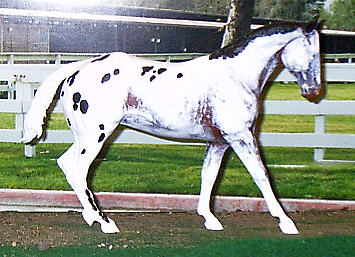
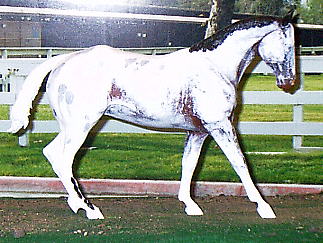
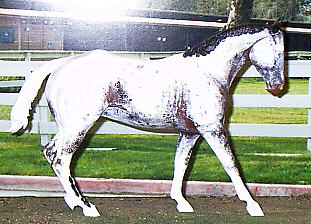
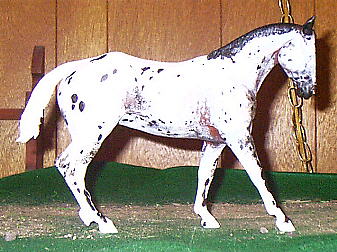
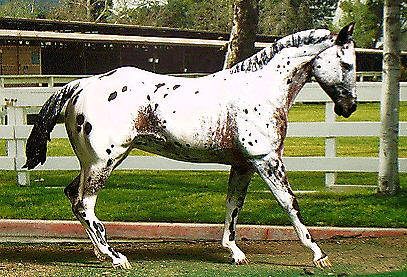
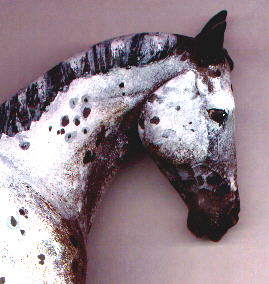
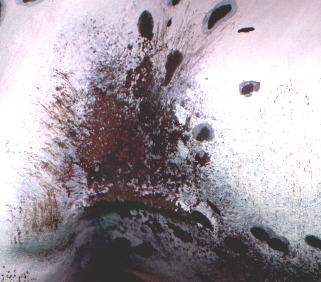
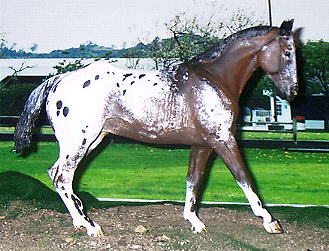
Thus begins the creation of "Hollywood  Showgirl"!

The horse is prepped, sanded, and gessoed. This particular "Ikandu" resin (sculpted by the very talented Lisa Rivera) has been customized with a new sculpted mane and tail. Here I've blocked out the basic pattern of the horse using a thinned down Burnt Sienna...it looks like she's heading for a large blanket with two front socks!


Once the basic pattern was blocked out, I set about building up a good solid color base of burnt sienna.


With the airbrush, I added some shadings to the neck, shoulders, head, legs and barrel.


And more shadings...adding straight burnt sienna to provide the lighter flank and elbow areas, then going back over with dark brown along the topline and legs and head.

This is all I'm going to do in regards to the base color...because now it's time for some WHITE!


I began the blanket by just brushing the Titanium White in a rough pattern using a rather wide, soft brush. It only took a couple of coats to build it up to a nice, dense white. Notice how rough and ragged I deliberately left the edges of the blanket...one of my pet peeves are people who paint Appy blankets just too neat and perfect! (yes, I said "Appy", so shoot me!) ;-)


Using a torn-off chunk of the egg crate foam (which I like because of its coarseness), I gently dabbed the thinned white paint (about the consistency of a good yogurt) along the edges of the blanket, softening it and roaning it out...the same treatment I also gave to the legs, neck, and on the face. It's very VERY important to use a THIN paint (not a wash, but not straight out of the tube either), otherwise you end up with the dreaded and scorned "Orange Peel" effect.

I might note at this point that I AM working from photo reference...at this point this horse's pattern is based on the famous Appaloosa stallion "Dreamfinder".


Using one of the destroyed paintbrushes I mentioned in the materials list, I took more of the thin white paint and dabbed and scrubbed along the pattern edges, forelegs, and a bit on the head. I also took a soft, FLAT brush and lightly put the "ribbing" behind the elbow.


AAAAAGH!!!! What happened!! Where'd all that beautifully shaded rich base color go??? AAAAGH!

Okay, I decided she was looking too similar to the past FOUR Appaloosas I'd painted, and since she's for my personal showstring, I wanted something different. No more resemblence to ole' Dreamfinder, we're going for the Leopard look. I broke out the egg crate foam again, and, well, roaned the living heckfire out of this poor gal. She's not really THAT white, thanks to the Flash on my camera, but pretty close.


Here, this is a better shot...at least now she's getting some spots in the mix! I just used dark brown (black and burnt sienna) to do the spots, with a soft, pointy brush...I draw the spot shape outline, then fill it in, seems to work best for me these days. Again I can't stress the importance of  REFERENCE MATERIAL as to actual Appy spotting patterns...there is a rhyme and reasoning to it, hard to believe. The only thing worse than Orange Peel painting and hard, straight blanket edges, IMO, is an Appy with perfectly round, perfectly spaced, identical spots over its entire body! No no no! Bad Spot! Bad!

Oh yes, I also blocked in the mane in black...like you need me to point that out, right.


Hey! Where'd the spots go???? They're there, look closely! I went over them with a wash of white to fade them back. Because they're going to be "peacock spots" (I love those!).


NOW what???? Well, I didn't think she was roany enough, so I went back with the egg crate foam, and this time dabbed it into the thinned down dark brown paint, and went along the edges of the pattern to bring back some dark brown roaning...you can see it on the back of the buttock, on the front of the gaskin, along the lower barrel and flank, forearms, shoulder, neck, and face.

Something I discovered is if you don't just "dab" it, but sort of dab lightly at an angle, almost drawing the sponge across the surface, you get the most delicate and wonderful hair texture!! Hey, I've been painting models since 1974, and I JUST discovered this this morning!! Try it, it's great...much easier than dinking around with colored pencils or cat whiskers or whatever!


Ah, now we're getting somewhere! SPOTS! Again with the same soft, pointy brush, I went over the peacock spots, inside them making smaller spots, so they have a "halo" of roaning...and following the hair pattern (assuming this chunk of plastic polymer resin had hair of course), drew on spots of all sizes and shapes. Yep, I've pretty much abandoned the photo of  "Dreamfinder" by now, though I did copy the spotting on the legs from him.


And She Is Done!! I'd done the wet-on-wet treatment for the mane and tail, blending and streaking (yet careful not to let it get grey and muddy). Painted up the hooves, chestnuts, naughty bits (sorry, couldn't get photos of those) eyes, nostrils, etc, and here she is! Hollywood Elite!

Here's some head detail on her, showing the roaning, spotting patterns on the head, the streaking of the mane, even some peacock spots on the neck.

Just some detailed illustration of the happy chaos that is the Appaloosa! Note the peacock spots, and the "hairy" spongework.

Finally, a detail of the hoof. I like to do dirty hooves...face it, no matter how much hoof polish you put on them, the instant that horse sets foot into a dirt arena, those feet are going to get dirty! Since this gal will probably be doing a lot of stockwork and trail, I'm not too concerned that she stay purdy! Although I haven't painted on her shoes (Lisa was so cool as to sculpt them on, along with nailheads in the hoof! Way cool, Lisa!), I shall shortly, and may even glue dirt inside the hoof bottoms to make her totally realistic!


ADDENDUM

You know how you buy something that you liked at the time, but the more you looked at it, the less you liked it? I'm afraid that happened with poor Hollywood  Showgirl. She wasn't showing well in Halter, I've found the wilder the pattern, the less successful an Appaloosa can be...perhaps she was just "too much", I don't know. Soooo....meet her new incarnation:

The Ikandu resin has a large butt to begin with, and this color just accentuates that. I may completely strip her and start over, with a smaller blanket, maybe a buckskin base color. If I do, you'll see it here! Thanks for reading!


UH OH! I did it again! I didn't care for the large blanket look after all, so, I did strip her and start over, and went the opposite direction, so now she's a black leopard! I think that's it though...I like her this way!